Showing posts with label leftovers. Show all posts

Thursday, November 3, 2011

Ketchup, Part Deux

My First Meatloaf Sandwich
 As promised, I made myself a meatloaf sandwich for lunch the day after our Sunday meatloaf dinner.

It was the first meatloaf sandwich I have ever eaten in my enitre life, which really surprises me because I love meat, I love sandwiches, and I'm from the Midwest.

Needless to say, I enjoyed every last bite. So much so, I didn't even give Bleu his normal lunchtime crumb or two.

I toasted a white bun, added cold meatloaf and ketchup, sliced some mozz cheese thinly, and plopped some thick slices of an heirloom Green Zebra tomato on top. Served with some re-heated ex-wife potatoes with Mayo and Fairy Dust dip, and I had myself quite a delightful lunch.  Midwestern style.
Of course, I sneak kale in my meatloaf!

Sunday, October 23, 2011

Two New Discoveries

I love gin.

In the summer it tastes like linen.

In the winter, pine needles.

Hand me a gin & tonic or a French 75 at any party or happy hour, and you'll find a very happy girl.

Determined to find a GF gin, I went on a woman-hunt and found Watershed Distillery's Gin made from corn. Of course, I found it at the end of the month when I couldn't justify paying for booze over food. And when we got paid, I didn't see it again for at least three months.

On a recent shopping trip to Rossford, I stopped in my favorite liquor store Corks, hoping I might find it again. And there it was, saying, "Manda, you just got paid and I'm perfect for French 75's." As my friend G would say, "Sign me up!"

Seriously, if you are a gin lover, other gins are untouchable. Watershed's Gin is perfectly tart and zesty. Perfect for mixing or for a straight martini. And even better it's distilled with corn. Score for GF! And even better better? It's made in Columbus, Ohio. Score for locavore!

The juniper berries are so pronounced and lovely, I keep imaging what it would taste like with venison. Jamie Oliver's venison tenderloin with juniper berries. Maybe overkill to some, but a match made in heaven to me.

::Sigh::

The only other person I know who loves gin as much as me is my good friend and Spatula co-star Sarah.

Which leads me to my other new obsession: Chicken Pate with Cashews and Basil.

This weekend I lent a helping hand to prep for Sarah's hubby's bday celebration. Part of tradition is to homemake pretzels dipped in lye (sp?). (That all whole situation is for a different blog post, which I had every intention of blogging about that until I tasted the pate.)

For one of the spreads for the pretzels or an app, Sarah asked if I would take charge of the chicken pate. Sure, easy, whatever.

Little did I know I was getting my first taste of a whole new food addiction. (Seriously, are Candy and Jeff coming for me?)

Sarah put me in charge of the pate. I began by browning chicken breasts in butter. And by brown, I meant brown. Each piece was crisp, after a full 1/2 hour and 1/4 gin and soda. Then I added the cashews and garlic and let them cook until the garlic was just about brown. We were worried about time, so we stuck the browned chicken chunks, cooked garlic, and cashews in a freezer-safe bowl for about 15 minutes. After 15 minutes, I put the mixture into Sarah's awesome food processor, gave it a whiz, added the mayo, cheese, and hot pepper sauce, and then processed it again. It was a little thick, so we added about a teaspoon of chicken stock and gave it a whiz again. At last I sprinkled in the basil and stirred it.

Let's stop talking about it. I'm hungry.

I will say, though, give me a French 75 and Chicken Pate on Nut Thins and I'm golden. So much umami equals so much happiness. If only there were three more meals in a day...

Monday, July 26, 2010

Stuffed, Part II

After making my Hot Pigs in a Summer Couture Wrap, I had about 4 cups of the filling leftover and one huge zucchini that was a gift from my friend Sarah.

Even before all the storms last week and this weekend, I saw a flash a fate-lightning that led me to this recipe: Stuffed Zucchini.

For my Stuffed Zucchini, all I did was cut a LARGE zucch in half, lengthwise, spoon out its seeds, add my filling from the Hot Pigs in a Summer Couture Wrap, drizzle a little local tomato sauce in the pan before and after putting the stuffed zucch in it, grate some of CJ's Farmstead Cheddar on top of the stuffing, and cover the pan with foil.

Again, I baked it on my grill for about 40 minutes on indirect medium heat. (Please see the note from my previous post.) And it turned out AWESOME.

Truthfully, the BIG zucchs are perfect for stuffing but they are a bit overwhelming to eat. I want you to know it's okay to eat half a half and then the filling from the other half and then see how full you are. If your stomach is full, you can grate its leftovers into a lunch salad or grate it and put and freeze it. No worries.

What's awesome is zucchinis have fed us two solid meals in two days in a row with abundant leftovers.

I can't complain.

Stuffed, Part I

"Turn your back on the little zucchini for just a few minutes and they grow into baseball bats," said Epicurious recipe review A Cook From NH.

I couldn't have said it better myself.

This growing season there so many summer squash I can barely grate it and freeze it enough before some more finds its way into our kitchen again. Be it from the community garden, a friend's garden, the farmers market, or the local farmer we order produce from, zucchini has aimed its target at me. And like a good cook, I'm up for the challenge.

On the Epicurious website, I found this recipe for Cabbage Stuffed with Beef, Zucchini and Herbs. While all the ingredients sounded like a perfect fit for my crisper drawers, the recipe reviews were something left to be desired.

But I braved it and tweaked this so-called bland recipe into a keeper. At least I feel confident saying that after getting the approval from our gracious neighbors and friends A & J who dedicated their Saturday night as taste testers.

What follows is the very revised version of the recipe from Self magazine using quite a bit of the comments from A Cook from California. I also must thank my mum-in-law Sally for giving her original pigs-in-a-blanket recipe that I used as a foundation.

Note: The baking instructions are clearly for summer. Being this last week Bowling Green only saw temps in the higher 90s, there was NO way I was going to turn on the oven. So I turned to my grill. I baked the cabbage rolls over indirect medium heat for 50 minutes. To get indirect heat on a charcoal grill, place a disposal aluminum pan in the middle of the charcoal tray. Fill the open space around the pan with 2 layers of charcoal. Bake the rolls in another disposable pan. (After cooking you can either recycle the pans or wash them for re-use. It's up to you.)

Hot Pigs in a Couture Summer Wrap (aka Pigs in a Blanket--Summer Style)

Suggested albums while cooking: The Beatles White Album, especially "Piggies" and Jay Farrar and Ben Gibbard's One Fast Move Or I'm Gone.  (Thanks, Jenn!)

1 large head of local cabbage
1 medium local zucchini
1 medium local summer squash
1 small local eggplant
1/2 bunch of kale
1 can diced tomatoes (local), drained (reserve juice)
2 medium local onions (red or white or mix)
3 local garlic gloves, minced
1 lb local, grass-fed ground beef
1 T each fresh local basil, parsely, thyme, & oregano
2 T organic olive oil, divided
1 c cooked rice
pinch of cloves
pinch of nutmeg

Sauce:
1 can zesty tomato soup (local) with 1/2 water, mixed well, and all of the herbs with some leftover for sprinkling.

Begin by cooking rice. Use wild grain rice, jasmine, minute brown rice, etc. Whatever you have on hand that floats your boat.

While rice is cooking, blanch cabbage. From the top of the head cut a straight incision that goes through the head (so surgical, I know) but that does not cut away any leaves. Blanch for 5 minutes or until bright green. If inner leaves aren't blanched enough, you can always re-submerge. Of course, you'll have ice cold water on hand to stop the cooking immediately after the head has been blanched. Set aside to drain and cool after ice bath. After cool, half and core cabbage, carefully tearing away leaves. Set leaves aside to dry and drain.

In an large non-stick skillet, brown ground beef with 1 T olive oil, salt, and pepper. Drain. Set Aside.

Saute onions and garlic until soft. Add squash, zucchini, eggplant, diced tomatoes, cloves, and nutmeg with a little of the diced tomato juice (I'm sorry I'm not technical like Cook's Illustrated). Cover and cook until soft. Add kale for last two minutes and cover again.

Stir in meat and cooked rice with veggie mixture.

Trim cabbage leaf veins so they are easier to fold. Be sure not to cut leaves.

Hold a leaf with the core side towards you. Add a bit of meat in its cup. Roll once, then fold in the sides and roll until it's covered. Place seam side down in a pan where the bottom is lightly covered with sauce.

Repeat until cabbage leaves are gone. (Recipe can be doubled and frozen, if you so wish.)

Pour remaining sauce over the rolls before covering with the pan with foil. 

Bake on the grill according to the above note. If baking in the house, preheat the over to 350F and bake for 45-60 minutes.

When done, as the French say, "Mange!"

For dessert, consider homemade brownies! Our friends made-from-scratch their brownies using a recipe from How to Boil Water.  As a brownie fanatic all I can say is that they were AWESOME, especially after they added whipped cream and Baileys to them.

Cheers to a fantastic dinner party!

Tuesday, June 22, 2010

Father's Day

I'm not sure if I would be the cook I am without Cook's Illustrated. I learn a lot from their testing narratives and their step-by-step instructions.

For Father's Day, I relied almost fully on the Cook's Illustrated's 2009 Summer Entertaining issue, and, not to brag, but the meal was huge hit.

Seriously, no one can go wrong with a Cook's Illustrated recipe.


The Menu:
Slow-Cooker North Carolina Pulled Pork
Grass-fed Burgers
Cool and Creamy Macaroni Salad
Buttermilk Cole Slaw
Root Beer Baked Beans (Food and Wine July 2010)
Strawberry Poke Cake

While the whole meal was easy to make, I feel like the pulled pork yielded the most flavor of all the dishes. And what was really great was I didn't have to worry about grilling it all day with temperatures in the 90's. Using the slow-cooker let me forget about it and get to my other dishes. And the flavor was AWESOME. Because the recipe calls for ham hocks, a rich red color emerged as well as a smoky, cured flavor. The meat was perfectly moist too. My Pops couldn't stop praising it, which made me feel good because I made it special for him on Father's Day.

The Macaroni Salad and Cole Slaw were fantastic. Perfectly easy make-ahead recipes, which made my cooking life extremely simple. And again great flavors, and, if there are leftovers, they keep for a couple of days.

I had higher hopes for the Root Beer Baked Beans. They were good, but I thought they needed less molasses and more smokiness. I think next time I will add coriander, cumin, and liquid smoke, and I'll cut down on the molasses.

Out of all the dishes, the best was the Strawberry Poke Cake. I was extremely worried about making the cake from scratch but it came out light and moist with a perfect crumble. I tweaked a few ingredients for this recipe, though, which I think made a difference. Cook's Illustrated calls for store-bought frozen strawberries, but I bought 2 quarts of homegrown strawberries, sprinkled them with a little sugar and froze them. Then I cooked them down to get the juice for the pokes and the puree for the jam filling. (I didn't want to use the fresh berries because Cook's Illustrated said the flavor was a bit inconsistent.) Instead of Strawberry Jell-O I used a plain gelatin. In my opinion the berries had enough flavor; I didn't want to cover up their natural sweetness with artificial flavoring. Finally, for my fresh whipped cream topping, I added vanilla to intensify the flavor.

My brother, one of the world's most picky eaters, had three pieces of my Strawberry Poke Cake. In other words, I never got a chance to photograph it. It was that good.

Good enough that I just might make it all over again for 4th of July.

Tuesday, May 4, 2010

Countdown


Only three more days until summer.


Which means more time to cook and eat.


Until then, it's all about quick, simple, and satisfying recipes like this one from Bon Appetit.

Monday, April 19, 2010

For the Love of Kale


The Kale Fairy (Homestead Gardens) has blessed me with the beginnings of a very tasty growing season.

And though I'm drowning in a sea of student essays, rubrics, and portfolio comments, I always find time to cook up some divine greens.

Enjoy my tribute to kale and the other spring greens. It's celebration of local produce! Yay!

Wednesday, March 3, 2010

Apple Two Ways


I had pork chops defrosting in the fridge.

I had a honeycrisp apple on hand and two green apples on hand.

So I started digging around in my magazine and cookbook stashes for "pork and apple" recipes.

Even though I've heard from many food friends that Martha Stewart's recipes don't always work for them, I've had a lot of luck with her Everyday Food Great Fast Food cookbook. (And I hope to have a lot of luck with her iPhone App too. I'll keep you posted on that!) Both of these apple-inspired recipes came from there.

The pork chops with apples and shallots were crisp (because of the broiling and the apples) and juicy without being too sweet. Because my Luginbill Family Farm chops were about an inch rather than the recommended 1/2 inch, they took a little longer to cook: 15 minutes plus rest time and they probably could have used 3 more minutes. They were a touch pink.

As a rider on the Everything's-Better-with-Bacon bandwagon, I felt the side of red cabbage and apples would keep the theme of crispness from the chops going with some more pork flavor. It definitely did. My only recommendation is taste frequently so you can add the right amount of salt and pepper. The vinegar was almost too prominent, but salt really cut that tangy-ness.

Both recipes were super easy. The cabbage just requires some planning. It does need to cook down for 45-60 minutes. But the chops were done and ready to serve in 30 hour flat.

Definitely two keepers and enough leftovers for FD and I to come home from teaching late, eat, and then grade. If I want a Spring Break, grading crazily now is the only way I'm going to get it.

Pork Chops with Apples and Shallots

Serves 4.

  • 2 tablespoons butter
  • 1/2 pound medium shallots, halved or quartered lengthwise (pieces should be about 3/4 inch thick)
  • 2 Granny Smith apples, peeled, cored, and cut into eighths
  • 1/2 cup white wine
  • 4 pork rib chops (each 1/2 inch thick and 6 to 8 ounces)
  • Coarse salt and ground pepper

Directions

  1. Heat broiler; set rack 4 inches from heat. In a large skillet, heat butter over medium-high. Add shallots; cook, stirring occasionally, until browned, about 5 minutes. Cover pan; reduce heat to medium. Continue cooking until shallots are soft, about 5 minutes more.
  2. Add apples and wine; cover, and cook until apples are beginning to soften, about 5 minutes. Uncover; cook, stirring, until most of the liquid has evaporated and apples are tender, 2 to 4 minutes more. Remove from heat; cover to keep warm.
  3. While apples are cooking, season pork chops generously with salt and pepper; place on a rimmed baking sheet. Broil until cooked through, 3 to 5 minutes per side. To serve, spoon warm apple mixture over chops.

Red Cabbage with Apples

Serves 4 to 6.

  • 2 slices bacon, cut into 1/2-inch strips
  • 1 small onion, halved and thinly sliced
  • 1 small head red cabbage, cored, quartered, and thinly sliced
  • 1 green apple, peeled and thinly sliced
  • 3 tablespoons cider vinegar
  • Coarse salt and ground pepper

Directions

  1. In a Dutch oven over medium heat, cook bacon until browned, 10 minutes.
  2. Add onion; cook until soft, 5 minutes.
  3. Add cabbage, apple, vinegar, and 1/4 cup water. Cook, stirring, until cabbage wilts, 5 minutes. Season with salt and pepper.
  4. Cover; cook, stirring occasionally, over medium-low heat to desired softness (if sticking, add water), 45 minutes to 1 hour.

Thursday, February 25, 2010

Lent: A Challenge in Not Eating Meat


For Lent I'm not eating meat on Fridays and on holy days.

As many of you know, I love meat. A lot.

True to my midwestern upbringing we eat meat and potatoes for almost every meal, as you probably have seen.

And the fallout from being on the Atkin's Diet is I have a fear of pasta.

But I've been pleasantly surprised by the pasta dishes I've started making during Lent.

On Ash Wednesday I cooked up my own spaghetti sauce thanks to a Cook's Illustrated recipe from May 1, 1997. (Old school and delicious!)

I was really pleased with the consistency, texture, and flavor. It's definitely one I'll use again and again.

I've been thinking a lot about the connection between food and religion. But I still have more thinking to do before I can post anything intelligent.

In the meantime, I hope you have as much success with this recipe as I did.

Ingredients


1 (28-ounce) can diced tomatoes or 1 can whole tomatoes ( not packed in puree or sauce)
2 medium cloves garlic , peeled
3 tablespoons extra-virgin olive oil
2 tablespoons coarsely chopped fresh basil leaves (about 8 leaves)
1/4 teaspoon granulated sugar
1 1/2 teaspoons table salt
3/4 pound pasta

Instructions

  1. 1. If using diced tomatoes, go to step 2. If using whole tomatoes, drain and reserve liquid. Dice tomatoes either by hand or in workbowl of food processor fitted with metal blade (three or four 1/2-second pulses). Tomatoes should be coarse, with 1/4-inch pieces visible. If necessary, add enough reserved liquid to tomatoes to total 2 cups.

  2. 2. Process garlic through garlic press into small bowl; stir in 1 teaspoon water (see note above). Heat 2 tablespoons oil and garlic in 10-inch sauté pan over medium heat until fragrant but not brown, about 2 minutes. Stir in tomatoes; simmer until thickened slightly, about 10 minutes. Stir in basil, sugar, and 1/2 teaspoon salt.

  3. 3. Meanwhile, cook pasta until al dente in large pot of boiling, salted water. Reserve 1/4 cup cooking water; drain pasta, and transfer it back to cooking pot. Mix in reserved cooking water, sauce, and remaining oil and salt; cook together over medium heat for 1 minute, stirring constantly, and serve immediately.

Sunday, February 21, 2010

Red-Cooked Rump Roast

We're almost out of our beef, Clementine.

Next time we're NOT splitting our 1/8. LOL!

Last year I struggled with figuring out what to do with the rolled rump roast. Today I just happened to stumble upon the Red-Cooked Rump Roast recipe in my one of my fav cookbooks, Not Your Mother's Slow Cooker Cookbook.

Not only was this recipe SUPER delicious, but also it was too easy to be sooo good. With a side of mashed potatoes and a salad, this spicy and savory beef dish is perfect.

And I have a feeling the leftovers are going to make spectacular sandwiches!


Red-Cooking Liquid:
1 1/2 c water
1 c low sodium soy sauce
1/4 c dry sherry
2 T sugar
2 green onions (white and green parts), roughly chopped
Two 1/2 inch slices ginger, lightly crushed
1 whole star anise
1 stick cinnamon
1 clove garlic, crushed
1 strip (about 3 inches) orange zest, removed with veggie peeler

Directions:

Pour red-cooking liquid into slow cooker. Cover and cook on HIGH for 30 minutes to 1 hour.

Put rump roast in cooker and turn to coat both sides with liquid. It is okay if the liquid covers the roast completely. Cover, turn the heat to LOW, and cook for 4 hours.

Turn over the roast, cover, and cook on LOW 3 to 4 hours more.

List roast out of cooking liquid and place on a cutting board. Allow to cool a bit, then carve into thin slices (about 1/4 inch thick) and serve with a few spoonfuls of the cooking liquid drizzled over it. Or, if you wish to serve it cold, refrigerate until chilled before slicing.

Allow remaining liquid to cool a bit, then pour through a fat strainer. Discard solids. Refrigerate liquid but do not cap until liquid has cooled completely. It will keep in fridge for a week to 10 days and in the freezer for 3 months. Thaw it before using. To reuse the liquid, remove and discard the solidified fat on top. Pour the liquid into the slow cooker crock, and proceed as directed int he recipe with fresh meat. After every 3rd or 4th use, refresh liquid by adding 1/2 c of soy sauce and half of the seasonings.

Recipe will work with a whole 3-4 lb broiler chicken too. Remove innards, dunk both sides, and go at it. (I hope to try this soon and report the outcome.)

Friday, February 12, 2010

Lighter Chicken Enchildas


If I could eat only one type of food for the rest of my life, it would be Mexican.

Growing up I always preferred Taco Bell to all other fast foods, and to this day it is still the only chain fast food I crave. And on my birthday when we lived in Fort Myers, Florida, my parents never asked me where I wanted to eat; they always knew I wanted Garcia's or Casa Lupita.

In Graduate school, I clearly remember one week in which I ate at Rio Grande in Saberton, WV eight times.

I'm not lying.

My biggest challenge since I started cooking and really caring about the food I eat is making Mexican myself. Back in the day I tried the box stuff, but since my palate and food values have changed, the box kits no longer appeal to me.

After testing countless recipes from the web and cookbooks, I finally found one that tested almost authentic.

Cook's Illustrated Lighter Chicken Enchiladas are my new food addiction. Of course, I didn't use the lighter cheese that the recipe calls for. But they still felt lighter and my scale didn't see any changes.

The best part of this recipe is the homemade enchilada sauce. It's easy, low in sodium, and incredibly tasty.

Hands down, this is the best enchilada recipe I've ever had. And the leftovers were even better!

Serves 6. Published July 15, 2008. From Cook's Illustrated.

Make sure that the cooked chicken is finely shredded, or the edges of large pieces will tear through the tortillas. Serve these enchiladas with lime wedges, low-fat sour cream, diced avocado, shredded lettuce, and hot sauce.

Ingredients
1 medium onion , chopped fine
1/2 teaspoon vegetable oil

Salt
3 medium cloves garlic , minced or pressed through a garlic press (about 1 tablespoon)
3 tablespoons chili powder
2 teaspoons ground cumin
2 teaspoons sugar

2 cans (8 ounces each) tomato sauce
1 cup water
1 pound boneless, skinless chicken breasts (about 2 large breasts), trimmed of excess fat

Ground black pepper
8 ounces 50 percent light cheddar cheese , shredded (2 cups)

1 can (4 ounces) pickled jalapeños , drained and chopped
1/2 cup minced fresh cilantro
12 (6-inch) soft corn tortillas

Vegetable cooking spray
1 lime , cut into wedges (for serving)

Instructions

  1. 1. Adjust an oven rack to the middle position and heat the oven to 400 degrees. Combine the onion, oil, and 1/2 teaspoon salt in a large saucepan. Cover and cook over medium-low heat, stirring often, until the onions have softened, 8 to 10 minutes. Stir in the garlic, chili powder, cumin, and sugar, and cook until fragrant, about 30 seconds. Stir in the tomato sauce and water, bring to a simmer, and cook until slightly thickened, about 5 minutes.

  2. 2. Nestle the chicken into the sauce. Reduce the heat to low, cover, and cook until the chicken is no longer pink in the center, and the thickest part registers 160 degrees on an instant-read thermometer, 10 to 12 minutes. Transfer the chicken to a plate; set aside to cool. Strain the sauce through a medium-mesh strainer into a medium bowl, pressing on the onions to extract as much liquid as possible. Season the sauce with salt and pepper to taste.

  3. 3. Once the chicken is cool enough to handle, shred into bite-sized pieces. Toss together the shredded chicken, 1/2 cup of the enchilada sauce, 1 cup of the cheddar, the jalapeños, and cilantro, and season with salt and pepper to taste.

  4. 4. Stack the tortillas on a microwave-safe plate, cover with plastic wrap, and microwave on high until warm and pliable, 40 to 60 seconds. Spread the warm tortillas out over a clean work surface. Place 1/3 cup of the chicken mixture evenly down the center of each tortilla. Tightly roll each tortilla around the filling and lay them seam-side down in a 13 by 9-inch baking dish.

  5. 5. Lightly spray the tops of the enchiladas with vegetable oil spray. Pour 1 cup of the remaining sauce over the enchiladas to coat them thoroughly. Sprinkle the remaining 1 cup cheddar down the center of the enchiladas. Cover the baking dish with foil and bake until the enchiladas are heated through, 20 to 25 minutes.

  6. 6. Remove the foil and continue to bake until the cheese browns, about 5 minutes longer. Serve, passing the remaining 1 cup sauce and the lime wedges separately.

Wednesday, December 30, 2009

Dinner: Black Bean Chilaquile


The Black Bean Chilaquile is probably my favorite Moosewood Recipe ever. It's perfect when you want something healthy, light, and filling. It's consistently awesome every time I make it, and it's my fall-back recipe when I cook for my vegetarian friends, who always praise it.

Tonight I reached for this recipe because I wanted something light to eat on the eve of our Revolver 7 course New Year's Eve meal. And I wanted something that was easy because cooking with a migraine isn't fun. (I know there are foods that cause migraines but are there foods that cure migraines?)

Here's the recipe with of my additions:

Ingredients:

1 cup chopped onion
1 T olive oil
1 can diced tomatoes (14 oz)
1 1/2 fresh or frozen corn kernels
1 can black beans (15 oz, drained)
2 T fresh lime juice
1 t salt
1/2 t black pepper
dash of cayenne pepper
dash of cumin
dash of chili pepper
couple drops of hot sauce (Cholula is our fav)
2 cups chopped Swiss chard, spinach, or kale
2 cups tortilla chips, crushed
8 oz shredded sharp cheddar
2 cups salsa

Directions:

Preheat oven to 350. Saute onion until translucent, 8 minutes. Stir in tomatoes, corn, black beans, lime, salt, pepper, and spices and continue to cook until heated through, about 5 to 10 minutes.

Meanwhile, saute greens for 1-3 minutes.

Prepare an 8X8 casserole dish or baking pan with light coating of oil. Spread half of the crushed tortilla chips on the bottom. Spoon the sauteed veggies over the chips and sprinkle with about 2/3 of the grated cheese. Arrange greens over the cheese and spoon half of the salsa. Finish with the rest of the tortilla chips and top with the remaining salsa and cheese. Bake for about 35-40 minutes, until the cheese is bubbling and beginning to brown.

Note: This recipe is always better the next day.

The Christmas Meal


All the holiday cooking turned out perfectly.
The mashed potatoes were a hit as well as the salad and breakfast casserole. I absolutely adored the salad, and it motivated me to no longer be afraid of de-seeding a pomegranate.
The curried applesauce perfectly cut the saltiness of the ham and enhanced its porkiness. But it was a bit different so I'm not sure my family really enjoyed it. You have to really love curry to really love the curried applesauce.
Of course, like all holidays, I forgot my little cooler at my parents' and sadly left behind the extra applesauce and a qt of Calder's Milk. I hope they found some use for them.
It was nice to cook for my family and share a meal with them. I'm looking forward to the day when FD and I can host a holiday meal in our own home. That will be the ultimate holiday cooking adventure for me. Until then, I'm delighted to make the sides and enjoy the holiday cheer. And I vow to continue working on my holiday baking--another resolution to add to the list.
For New Year's Eve's meal we're heading to Revolver for our annual tradition. I can't wait!

Wednesday, December 23, 2009

Holiday Cooking: Day 2, Part 2


Crack Potatoes. A holiday must.

(Check out my December column in Connotation Press to learn more about my obsession with Crack Potatoes.)

And as much as I love Crack Potatoes, I love gravy. Because my family is doing a ham, we're sans gravy this year.

So to ensure creaminess and flavor without gravy, I put a twist on the traditional Crack Potatoes recipe with the help of Cook's Illustrated Entertaining Issue 2009.

What I love about Crack Potatoes is you can make them ahead-of-time and they're another easy-to-transport dish.

Ingredients for Topping:
4 slices white bread (I used Zingerman's Bakerhouse White)
2 T butter, melted
1/4 c fresh parsley
salt & pepper

Directions for Topping:

Heat over to 300. Quarter each piece of bread and then pulse in food processor to course crumbs. Toss crumbs with melted butter and spread on baking sheet. Bake, stirring occasionally, until golden, about 20 minutes. Let crumbs cool, then toss with parsley, salt and pepper.

Ingredients for Potatoes:
5 lbs potatoes, peeled, sliced into 3/4 inch thick rounds, and rinse thoroughly. (I used a mix of our local French Fingerlings, All Red, and Carola potatoes.)
2 1/2 c 2% milk, warmed
1 c sour cream
8 T butter, melted
2 1/2 t Dijon mustard
1 med garlic clove, minced
pinch cayenne pepper
salt and pepper
8 oz extra-sharp cheddar cheese, shredded

Bring potatoes to boil over high heat, then reduce to simmer until potatoes are tender, about 15 minutes.

Meanwhile in a small saucepan melt butter over medium heat, then add milk and garlic. Stir until warm.

Drain potatoes in colander. In batches mash potatoes. (You can use a ricer, but this time I used my stand-mixer to save time.) Stir in milk mixture, sour cream, mustard, and cayenne pepper. Season with salt and pepper. (The potatoes may seem really "wet," but don't fret. Keep stirring; they will thicken.)

Pour potatoes into 13X9 baking dish. Sprinkle shredded cheese on top then breadcrumbs.

To cook immediately: Heat oven to 350, bake uncovered, until hot throughout, 25-30 minutes.

To make ahead (up to 2 days ahead): Wrap casserole in plastic. To cook, unwrap plastic and top with foil. Bake for 20 minutes at 350, covered. Remove foil, bake until topping is crisp, 20-30 minutes more.

--I'm dying to see how this Crack Potatoes recipe turns out. I'll keep you posted.

Friday, December 18, 2009

Tis the Season of Potlucks


This week we had our office potluck.


I brought a new chili recipe that I found on epicurious. But I doctored it up quite a bit. See below for my take.


My co-workers went all out too; they made sausage won tons, homemade apple pie, better brushetta, and spinach dip. Plus we had a great assortment of fruit and veggies with hummus and other dipping sauces.


I was quite happy and full. A good time was had by all.


Here's the recipe for the chili with my revisions:


1/2 pound bacon, coarsely chopped
2 pounds lean ground beef
1 28-ounce can Italian-style tomatoes, tomatoes chopped, juices reserved
2 15 1/2-ounce cans black beans

1 medium onion, chopped

2 cloves garlic, minced
2 fresh hot chilies

3 T Cumin

2 T Chili Powder

pinch of cinnamon

1 bottle beer


Preparation:

Sauté bacon in heavy large pot or Dutch oven over medium-high heat until brown, about 4 minutes. Drain off fat and discard. Add beef to pot and sauté,. with onion and garlic, until brown, breaking up clumps with back of spoon, about 7 minutes. Drain beef. Add tomatoes with juices, beans and spices. Bring chili to boil. Add beer. Reduce heat to medium-low and cook until thickened to desired consistency, stirring occasionally, about 3 hours. Season to taste with salt and pepper. Ladle chili into bowls. Serve, passing cheese, onions and sour cream separately.


(Make ahead: pour chili into crock pot. Refridgerate overnight. Reheat in crock pot for 3-4 hours on low.)

Sunday, December 13, 2009

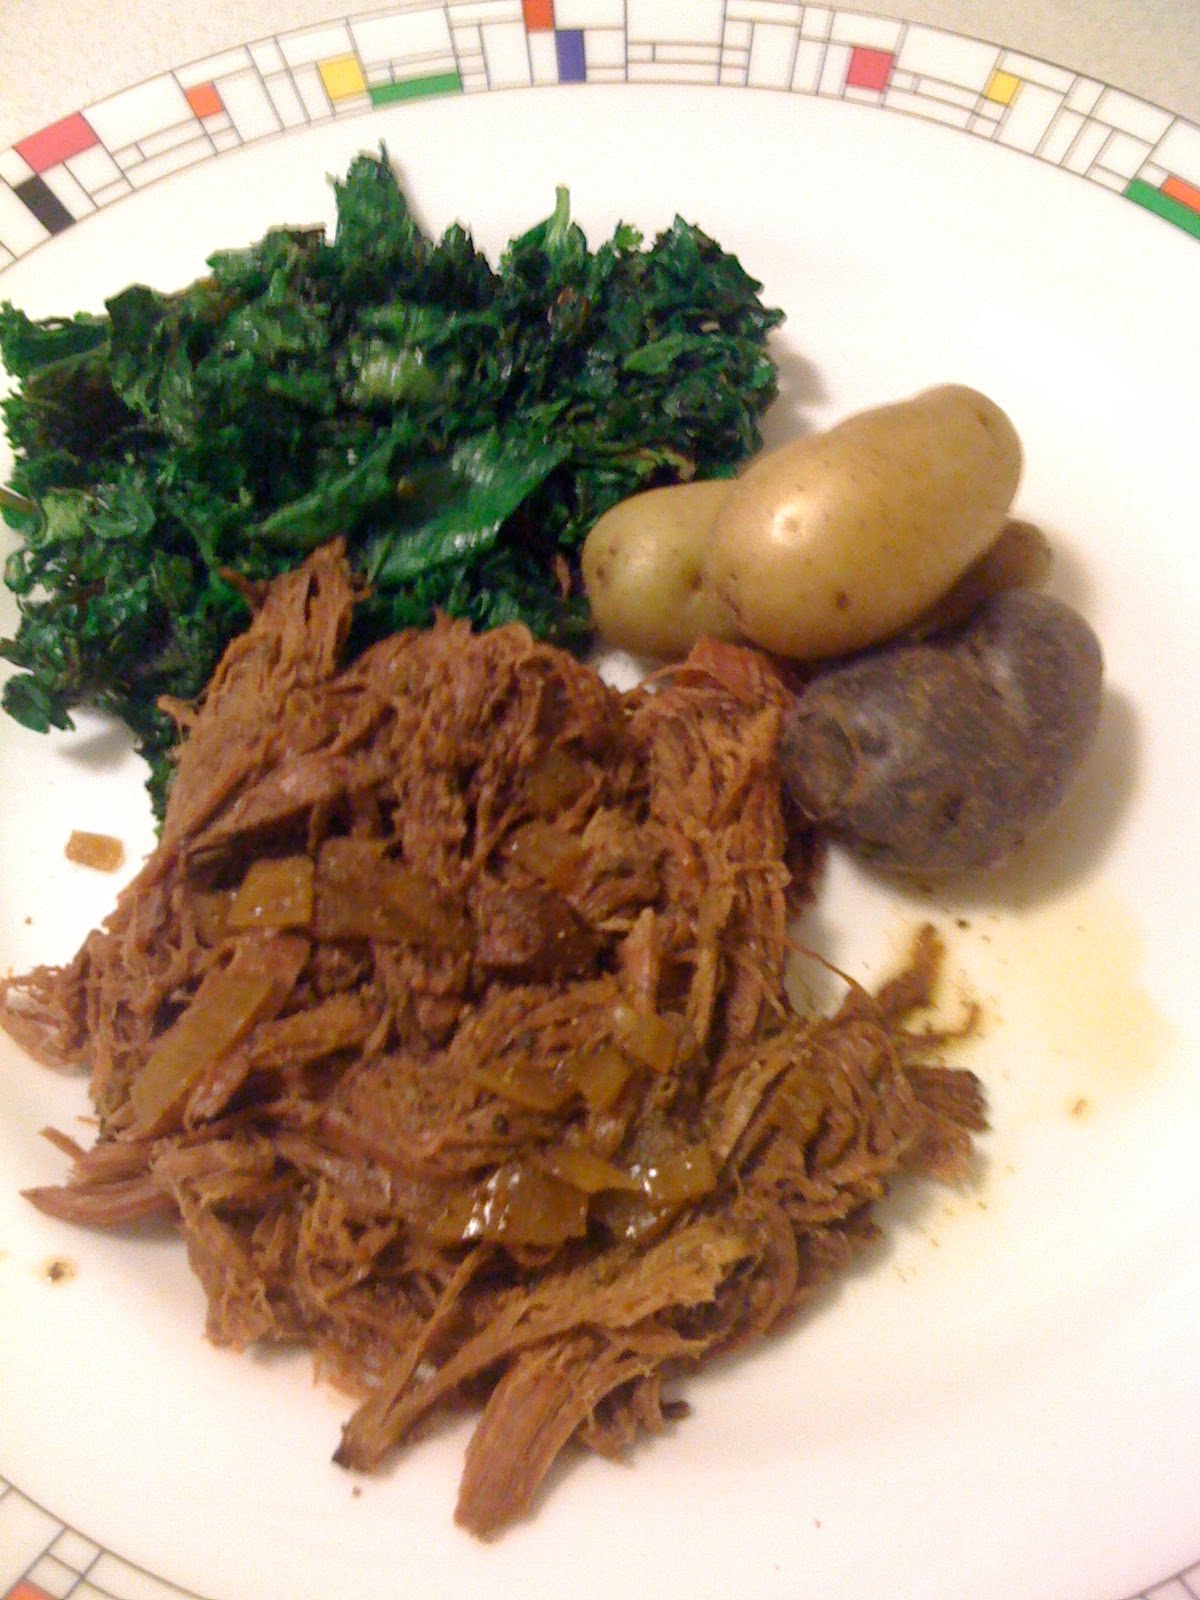
Dinner: Cider Braised Pork Shoulder with Mashed Taters and Flash Fried Kale

Rachel Zucker shared this recipe for Cider Braised Pork Shoulder when she visited BG this past fall.

I tried it once before, and it was tasty but--believe it or not--I over-braised the meat. I didn't check on it enough, and just let it cook for 3 hours. I should have taken it out at 2 1/4 hours. (Hence, why I never blogged about it, even though I should have.) Cook and learn, which I did.

This time was a different story. The caramelized onions were perfect. There was a bunch of juice at the end of the braising time, which made a fantastic sauce. (Add a 1/4 to 1/2 cup more cider than is called for.) I mashed the potatoes just right using my stand mixer rather than a ricer, and the kale just made the meal even more earthy.

Not to brag, but I kinda out-did myself tonight.

And there is enough meat for sandwiches and other concoctions all week long. God bless leftovers.

This is definitely how I'll cook pork shoulder and butt in the future. Thanks for sharing, Rachel!

Tuesday, September 22, 2009

The Cooking Spree Before This Week's Grading Spree


This week is a busy one in the McRz household, so rather than being tempted by getting take-out I took matters into my own hands.

Yesterday I used up almost all of our local produce and made 3--not to brag--fantastic meals.

1.) Spinach Ricotta Pie from The Moosewood Collective. I cheated and purchased a pie crust at the grocery store. I just neither had the ambition or the time to make dough.

2.) Eggplant Parm. We loved this dish when I made it before, and I knew something hearty like it
would help us throughout the week. Sides for it are really easy too: some noodles with leftover sauce, brussel sprouts, or salad.

3.) For dinner last night I made Jamie Oliver's Juiciest Pork Chops with roasted beets and parsnips, which we given to us by our friend Sarah, from his cookbook Jamie at Home. And I
pan seared some brussel sprouts for the heck of it. It was a perfect dinner if I do say so myself, and the added step of added lemon to the pork chops' juices made a huge difference in the taste of the dish--another worthwhile step.

It's time to get to all that grading and the busy week ahead of us. That is, now that we have some good food to help us through it!

Sunday, September 20, 2009

Pork: My Favorite White Meat

Last weekend, FD and I picked up our half hog from Luginbill Farms in Pandora.

Petunia the Pig.

She's one tasty treat.

I made Jamie Oliver's Spicy Pork and Chili-Pepper Goulash with one of many shoulder roasts. This recipe was fantastic, but it was truly even better the next day and the day after that. The trick to this recipe is to make the sour cream with parsley and lemon zest. The sour cream helped to cut the heat a bit and lemon brought out the taste of the pork. We made basmati rice with ours, and its nutty flavor added another layer to the dish.

It's been a busy last few weeks, which is obvious based on how little I've been posting. So any make-ahead dinners I can make I'm making. I will make this one again and again, especially when I have tons of hot peppers I need to use.

Jamie Oliver is one of my favorite chefs right now too. Yes, partly because he is HOT! But mostly because I feel like our food values are most compatible. He's really into local, organic, free-range, sustainable, from the wild, including mushrooms and game, foods. And his recipes, while a bit more intuitive than Cook's Illustrated, always turn out for me. Always.

And I feel like I learn something new about them each time I make them. I like that. And I like him. He seems like a cheery mate.

And he makes me feel cheery, even when I'm stressed out and busy.


Wednesday, September 2, 2009

One Success. One Failure.


This coming weekend I'm fleeing to the Cleve to help my sis&bro-in-law with the little burrito & Miss L. (And I'm helping her organize, which some of you know is seriously one of my favorite OCD things to do!) To give us more time together and to give them some quick meals, I'm going to come bearing the one thing I feel that expresses true love.

I come bearing food.

In the quiet moments of a really busy work week, I've been plotting, planning, and searching for fab cook-ahead recipes that could freeze well. Of course, I headed to my Cook's Illustrated Make-Ahead magazine and found there a great recipe for Mac & Cheese--something I know Miss L adores.

When I discovered the Whole Foods app for the iPhone, I immediately found a make-ahead recipe for meatloaf, the perfect protein for Mac & Cheese. I got a head of organic lettuce and some organic veggies from our local farmer and now I've got a side salad. Perfect for one night.

For another night I'm going to make Jamie Oliver's roasted chicken. That way they can use the leftover chicken however they see fit.

But I wanted to give them something frozen to have on hand in a pinch. I bought the September 2009 Everyday Food and found just what I was looking for: a one-pot beef stew and freezes really well. Bullseye.

Tonight I made the beef stew and it looks exactly like the pic in Everyday Food, and the flavor is out of this world. I'm really really really pleased with this recipe! And it was the easiest, cleanest beef stew I have ever made in my life. This one is a keeper, for sure!

Then I got ambitious and the cookie crumbled. Literally. To further impress my niece Miss L., I wanted to make her a special cookie--a dog-shaped cookie. I have the cutter; all I needed was a recipe. I found a sugar cookie with lavender I've been meaning to try. Good.

Everything seemed to be going good until I attempted to cut the cookies. I couldn't get them to stay in their forms. And then I overcooked them. I'm thinking next time the butter should be even more so at room temperature before I begin baking. And I'm thinking I'm going to need to ask Babs, the dessert-ess herself, to oversee my baking.

But one out of two ain't bad...

Monday, August 31, 2009

Dinner: Sunday Night: Sauerbraten


After a long hot summer, all I crave is fall. So when the temperature dropped into the 60s this past Sunday, I made a Sauerbraten, the perfect fall dish.

The best Sauerbraten recipe is my mother-in-law's, but I wanted to test something new--a recipe from Bobby Flay. I don't normally cook Bobby Flay recipes. I'm not going to lie; I don't really like Bobby Flay. He seems shady to me. I'm sure he's a great guy, but I'm a Jamie Oliver kind of girl. But I found this fantastic recipe for Sauerbraten from his Nana, and I had to try it.

And it was awesome! Seriously awesome! However, I actually like my mother-in-law's recipe better. Maybe it's just because it's our family recipe. I don't know. But I would make Bobby Flay's again. I just think I wouldn't have a couple of absinthe drinks while it was simmering for three hours (Happy 21st, SEM! Love you, girl!) However, I will braise cabbage to go with Sally's recipe; that cabbage was RAD!

Sally's Old World Sauerbraten

Ingredients:
1 (3-4 lb) chuck roast
1 clove garlic, chopped
1/2 c. vinegar
1/2 t. ginger
1 c. water
3 bay leaves
1/2 c. brown sugar
1/4 t. thyme
1 t salt
2 onions, thinly sliced
1/4 t. pepper
1 T. butter
4-5 whole cloves

Directions:
Brown roast in butter. Add onions and brown. Mix remaining ingredients in a small bowl and pour over the roast. Simmer on the stovetop for 3 hours or in a slowcooker for 6 hours. If you desire, thicken sauce with flour. Serve with egg noodles.

(This is a fabulous make-ahead dish for a busy week! Check out FD's tasty sandwich he made for lunch: pumpernickel, sauerbraten, cabbage, hot mustard, & gravy.)